How To Use
Pre requisites for a Lumino Node
- Access to a synched RSK node. You can do this in a variety of ways:
- Public nodes
- Run your own node on TestNet or Mainnet
- Compile and run a RSK node locally
- RSK account with R-BTC balance
- Python 3.7
- Pip
- Virtualenv
Build your Lumino Node
Note: We’re actually using Linux, it may be different in others OS
- Clone https://github.com/rsksmart/lumino (We’re actually using branch "light-client-payments-onboarding")
- Go to the path that you cloned the node
- Create python virtual-env for Rif Lumino (Has to be made only one time)
virtualenv -p \<PATH\_TO\_PYTHON3.7\> clientEnv- Usually the path to python3.7 is /usr/bin/python3.7
- Activate virtual env
-
source clientEnv/bin/activatel
-
- Check if your python version is correctly installed
python --version (it should output version 3.7.x)
- Install Lumino requirements (For dev purposes we use requirements-dev.txt)
pip install -r requirements-dev.txt -c constraints.txt -e .
- You’re ready to start your Lumino node!
Be sure the blockchain has the contracts deployed
When deploying the contracts you should store 3 parameters brought to you, to later deploy your node, parameters are: EndpointRegistry, SecretRegistry, TokenNetworkRegistry
Run your Lumino node
Open your terminal, go to your Lumino folder installation and activate virtual_env:
- source clientEnv/bin/activate
With virtual-env activated run the following command:
lumino

--keystore-path $KEYSTORE\_PATH

--network-id 33

--eth-rpc-endpoint $RSK\_NODE\_URL

--environment-type development

--tokennetwork-registry-contract-address=$TOKENNETWORK\_REGISTRY\_CONTRACT\_ADDRESS

--secret-registry-contract-address=$SECRET\_REGISTRY\_CONTRACT\_ADDRESS

--endpoint-registry-contract-address=$ENDPOINT\_REGISTRY\_CONTRACT\_ADDRESS

--no-sync-check

--api-address=localhost:5001

--discoverable  #If this flag is present, then your node will be registered on Lumino Explorer

--rnsdomain=$YOUR\_RNS\_DOMAIN
| FIELD | DESCRIPTION |
|---|---|
| $KEYSTORE\_PATH | The path to your keystore |
| $RSK\_NODE\_URL | URL of your RSK node ([http://URL:PORT](about:blank)) |
| $TOKENNETWORK\_REGISTRY\_CONTRACT\_ADDRESS | Address for the token registry contract deployed (view contracts table) |
| $SECRET\_REGISTRY\_CONTRACT\_ADDRESS | Address for the secret registry contract deployed (view contracts table) |
| $ENDPOINT\_REGISTRY\_CONTRACT\_ADDRESS | Address for the secret registry contract deployed (view contracts table) |
| $YOUR\_RNS\_DOMAIN | RNS address associated with your rsk node address. i.e: --rnsdomain=lumino.rsk.co This parameter is optional |
- After you run this command a Privacy Warning will be displayed in the console, you must accept it to continue
- Select the Account that you want to use to run this node, and put your password to unlock it
- Your node is running!
For more information or for a guide about how to install it please go to: https://github.com/rsksmart/lumino
Access the UI
To access the Dashboard of your Lumino node, use a browser and put the URL you settled in the api-address param before. We’re going to use localhost:5002 in this example.
Dashboard
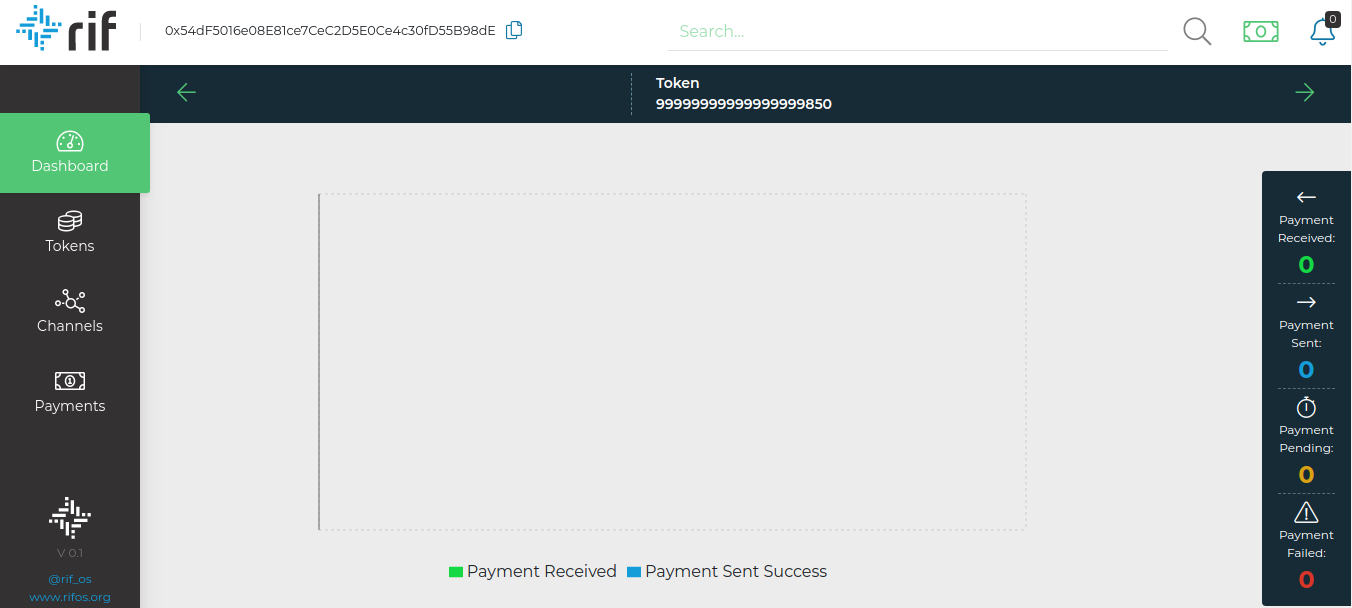
Let’s talk about the dashboard view:
Header

- At the left we have the Address of the node
- There is a global search bar where we can search by the following criterias:
- Lumino Nodes
- Channels
- Tokens
- Quick payment (we will talk more about this in the following sections)
- Notifications Bell, in there we are going to see a list of Todo’s, and all sorts of things related to notifications, like when a payment has been made, etc.
Quick Payment
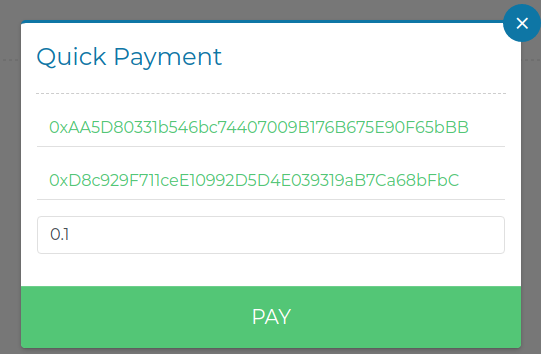
The idea of this modal is to make a payment to any partner in any token. The link is available across all the site so it can be accessed very fast for every part of the site.
To make a payment we need to indicate 3 parameters:
- Partner address: Node we want to make the payment
- Token Address: Token in which we want to pay
- Amount: Amount of tokens to be sent.
After you hit "pay" a new payment will be initiated and you can see the state in the Notification Bell icon at the header.
Token view
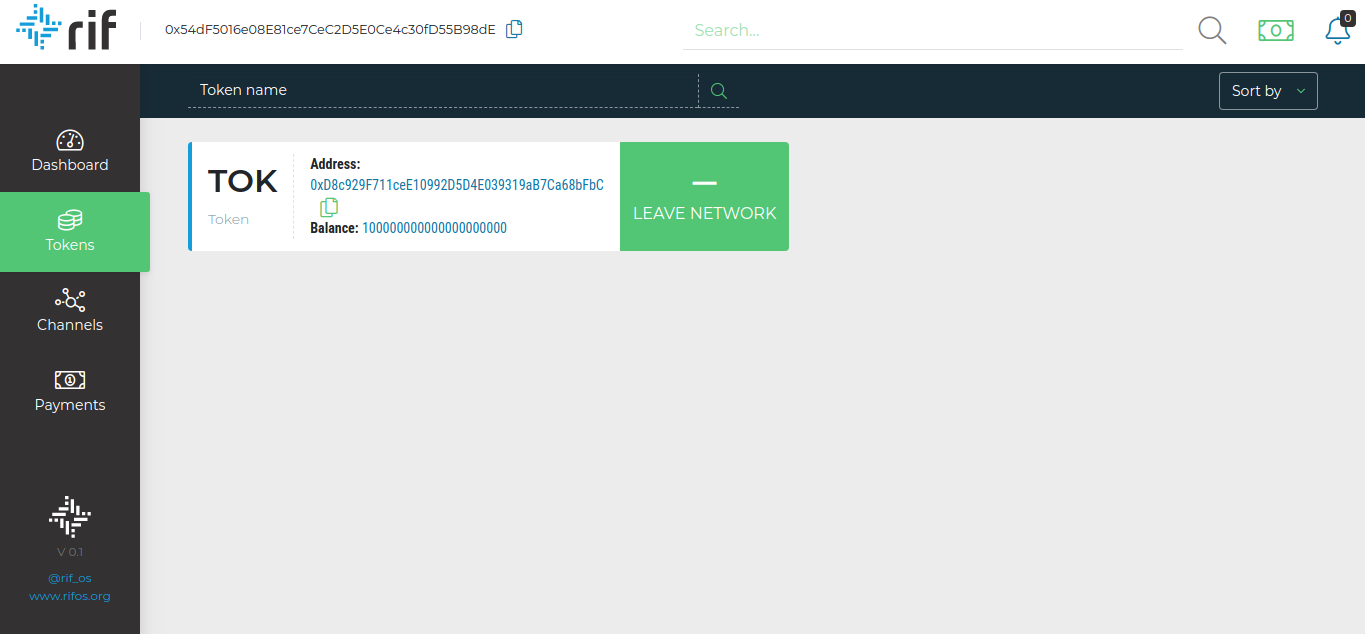
In this view you can see all the tokens registered in the Lumino Network, for this we just have one token registered called "Token".
The view has a filter bar where you can search by name, or sort by Name, Symbol or Balance.
Each token display the following information & actions:
- Token Address: The Address of this token
- Balance: your balance on the particular token
- Two possible actions (just one is displayed):
- Join Network: If you don’t have any channel open in this token this button will show. If you go for this action Lumino will create 3 new channels in the token with random partners. This function is very useful when you want to have channels in a particular token to start to send & receive payments but you don’t know any other partner yet
- Leave Network: If you already have at least one channel in the token, a Leave Network action will appear. This action will close ALL your open channels in the token.
Channels
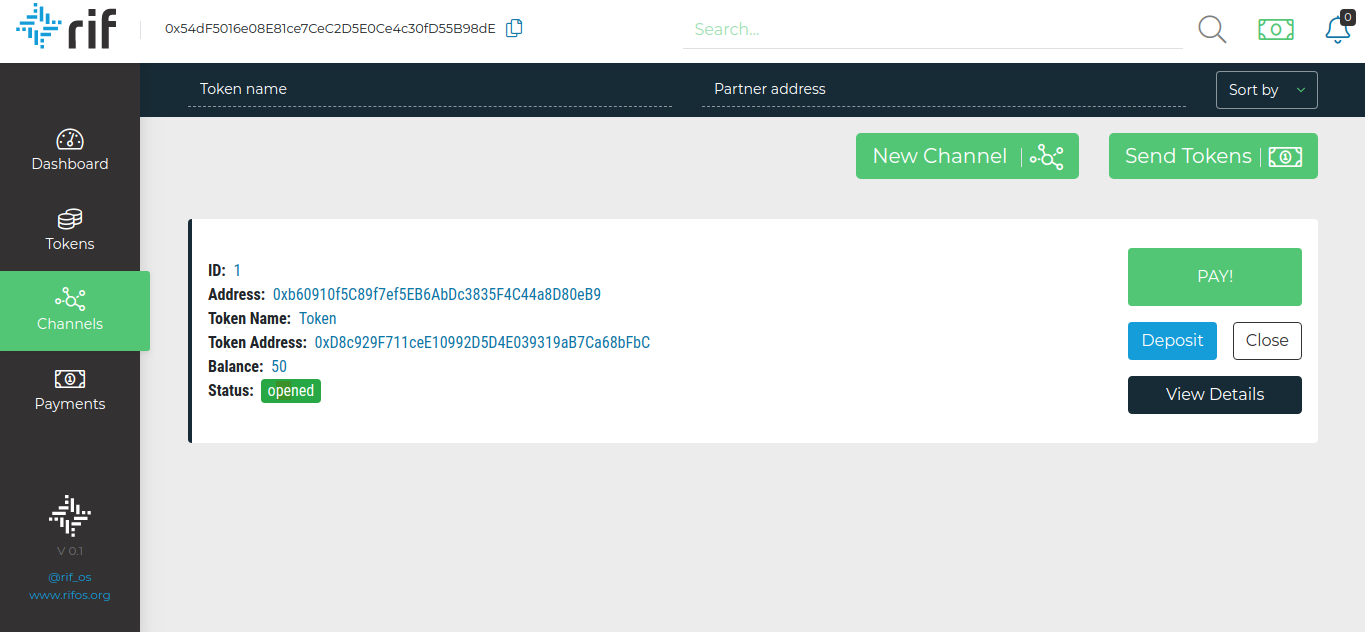
This view is used for:
- Create channels between nodes
- Send tokens (Like the one we made in Quick payment)
- Interact with each channel created with our node, here we can make the following actions:
- Make a payment over this channel (this will be an offchain payment)
- Deposit more tokens in the channel (this require an onchain transaction)
- See a detail of the transactions for the channel
- Close the channel (this require an onchain transaction)
See below so we explain in more detail each part of this page
Button Send Tokens
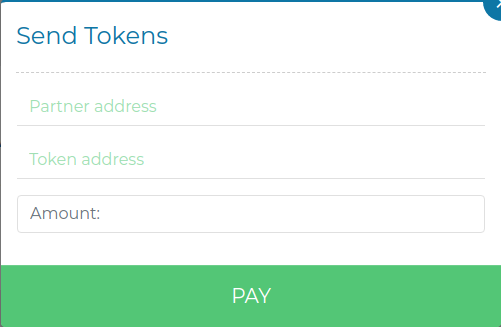
As the boxes indicates, you need to put the Partner Address with you will open this new channel; A token address and an Amount to be added as your initial balance on the channel (of course you can always deposit more tokens after you create the channel).
After you create the channel, you will see a new channel widget like the following in the channel list:
We already discussed about the actions before, so let’s talk about the information displayed:
- Channel Id: The id of the channel
- Address of the partner
- Token used on this channel
- And your balance in this particular channel
- Status: the status of the channel
Pay button (from channel widget)
As an example we’re going to send some tokens to the partner, lets send 15 tokens:
After that, we receive a Success message indicating the amount that we just sent (When the transaction is done):
Reminder note: In the notifications we display the amounts in wei, that’s why you see those big numbers there.
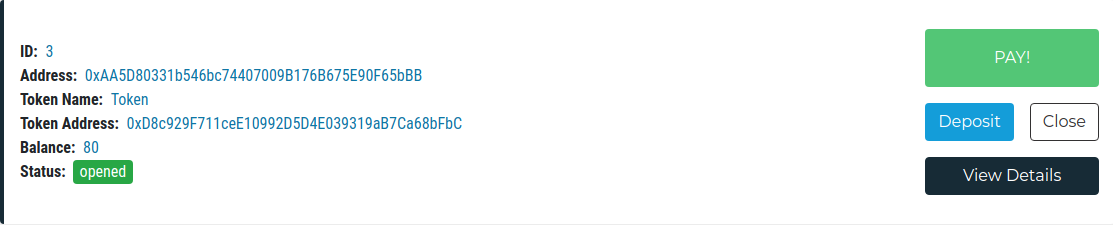
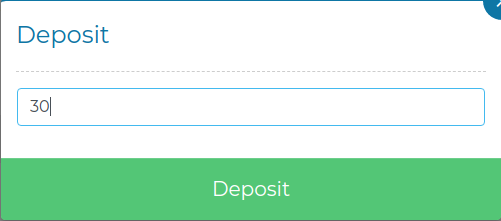
Deposit button (from channel widget)
If we want to deposit more tokens in the channel we can do it by clicking the Deposit button, and indicating some amount. Let’s add some tokens to the balance at our node side.
After we receive the confirmation, check the channel and you’ll see that in effect, the balance is upgraded
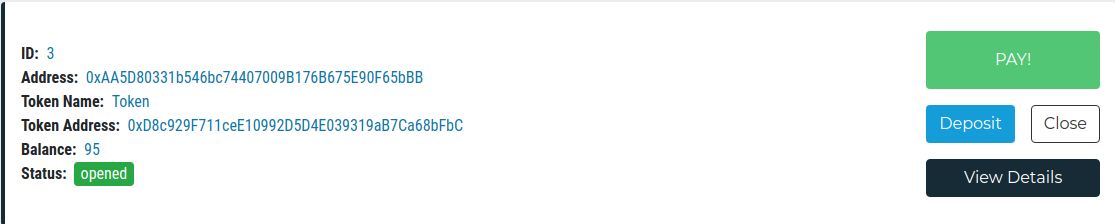
Remember, we got 80 at the start, we paid 15 to our partner, and now we deposited 30.
Reminder note: Of course you must have enough onchain balance in order to make the deposit.
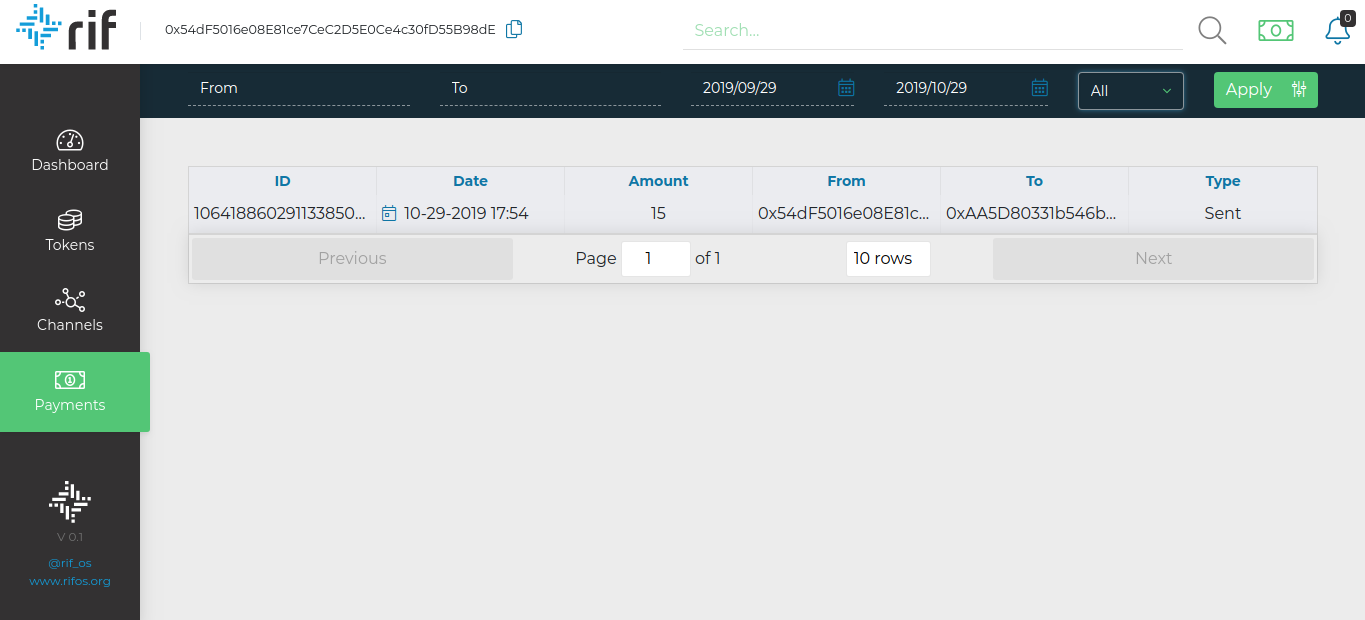
View Details button (from channel widget)
Let’s check the View Details button, so we can see the transaction that we recently made

In this view we can see all the transactions that has been made in the channel that we click the View details button.
Here we got some features to filter the transactions that happened in the channel.
- You can filter by date, indicating a from/to date
- Filter in the dropbox by
- All, it will not discriminate the data
- Received, just what your partner have sent
- Failed, in case of fail, you can review all the failures here
- Sent, successful cases
- Pagination
- Indicate how many rows you want to see. Options are: 5, 10, 20, 25, 50, 100 rows.
- Advance between pages
- Also you have some interesting data presented with more beauty in the top of the page. Such as your address, the token that we’re using, and the partner address.
Close (Channel)
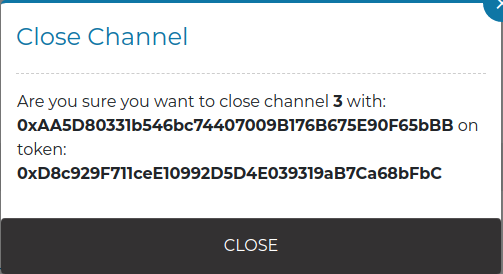
When clicking the close, you’ll need to confirm the action.
The channel status will go to "Closed" and then after a few validations, it’ll go to "Waiting_for_settlement" (This action will take 500 blocks), after that the channel status will say "Settled" for a short period and the channel will be deleted from the view.
When all this procedures are finished the payment is done.
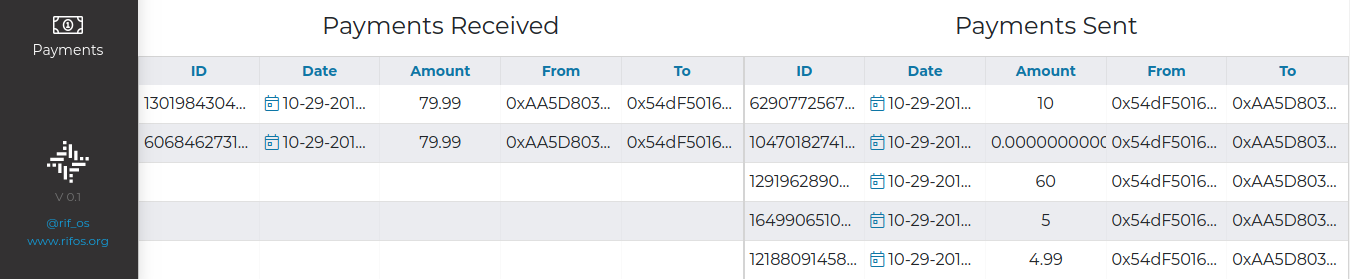
Payments
This view is similar to the view details button of each channel, in resume it shows all the payments made in the channels. It simply does not discriminate by channel, like the view details button does.
Before you leave, lets see how all the changes we have made affected the dashboard:
(We have made some changes, transactions and failures to see more numbers in this screenshot)
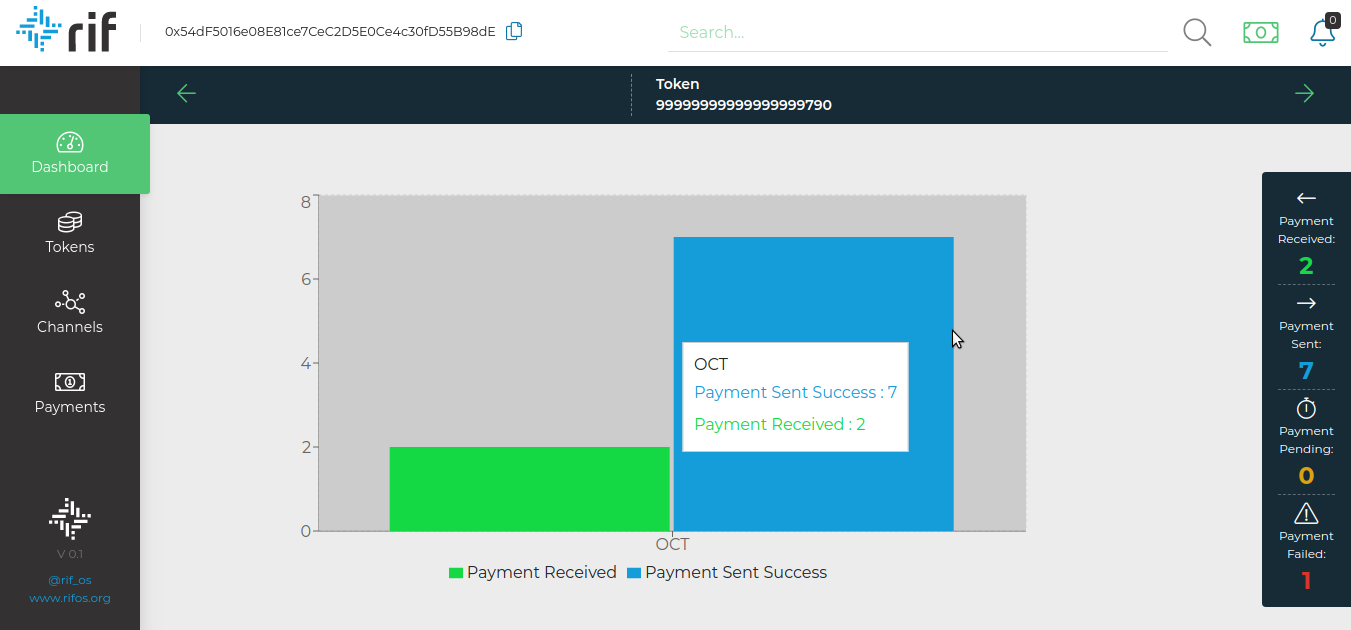
Just metrics that we find useful to you
(Also if you scroll down a little bit you will see a small table with relevant data, like in payments)